Ultimaker Cura Adaptive Layers Tutorial
June 08, 2023
How to use Ultimaker Cura Adaptive Layers to Reduce Print Time Without Sacrificing Quality
In Ultimaker Cura v3.2.0, a new feature has been introduced called Adaptive Layers. This feature is a great way of reducing print time without sacrificing print quality.
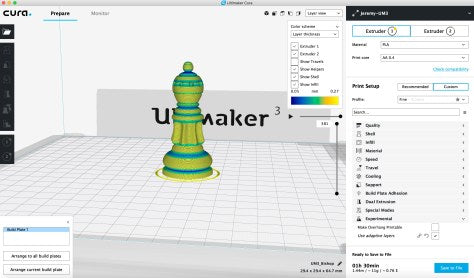
The Adaptive Layers setting will automatically adjust the layer height throughout the object depending on the geometry of what's being printed. Areas with significant curves will be printed with thinner layers, while areas without significant variations will be printed with thicker layers. This way, curved surfaces still look nice and smooth, but the overall print time is less than it would be if you just used a small layer height for the entire object.
In the video we produced to demonstrate this feature, we printed a chess piece with and without the Adaptive Layers setting. Without this setting, the print took 2 hrs 13 min. With the setting enabled, it took 1 hr 33 min – a reduction of 40 minutes (30%).
Check out the video demonstration here:
To use this feature, you must have Cura v3.2.0 or later. You can download it here: https://ultimaker.com/en/products/ultimaker-cura-software
Then, follow these steps:
- Make sure you're in “Custom” mode, not “Recommended” mode.

2. Go to Preferences / Settings, and use the search box to find the Adaptive Layers settings and enable them.

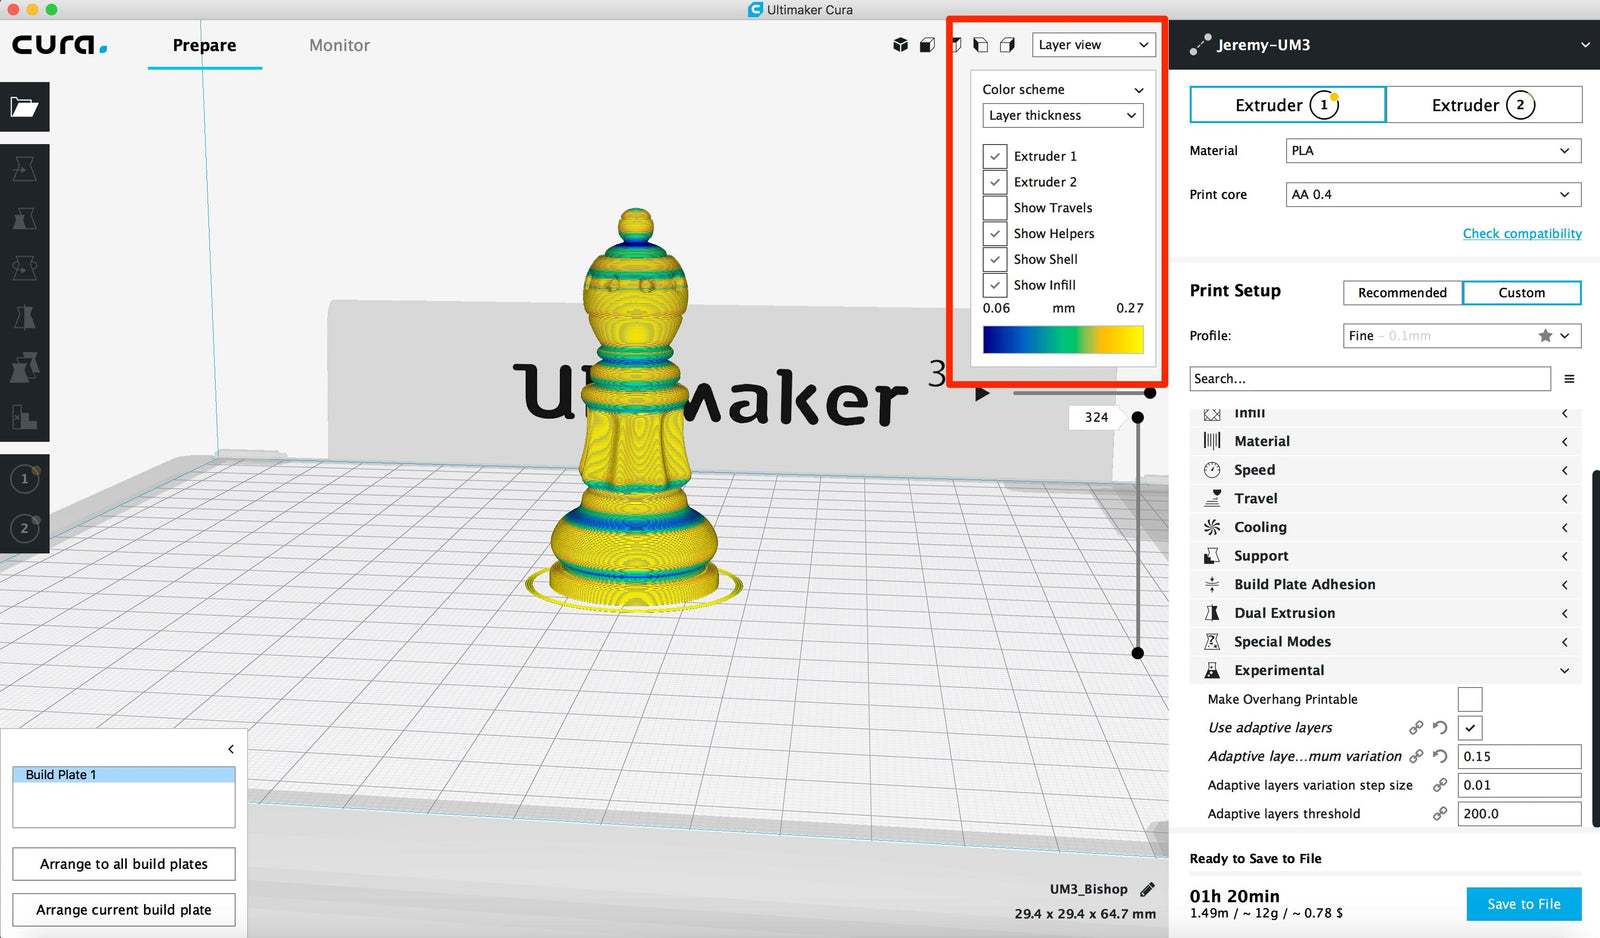
3. Setup your print job and select the Adaptive Layers setting under the “Experimental” settings group.

4. Optionally, configure the advanced Adaptive Layers settings:
Adaptive layers minimum variation: This setting controls the maximum allowed layer height difference compared to the base layer height setting (as defined under Quality / Layer Height).
Adaptive layers variation step size: The difference in the height of the next layer compared to the previous one.
Adaptive layers threshold: Determines how likely thinner layers will be used. Smaller values result in more thinner layers, while larger values result in a tendency toward thicker layers.
5. After the print job slices, change the view mode from “Solid object” to “Layer view,” and change the color scheme to “Layer thickness.”

6. Print!
More 3D Universe blog posts:
Learn more about Ultimaker HERE.
Learn more about the Ultimaker 3 and the Ultimaker 3 Extended HERE.

