Library Workshop - Creating a 3D Printing Time-Lapse
June 08, 2023

I recently did a workshop with my local library, the Algonquin Area Public Library District. Working with a group of about a dozen 4th through 8th graders, we selected an object to 3D print and then created a 3D printing time-lapse video of the project. This provided a great opportunity to introduce the kids to 3D printing in a fun and exciting way, and it also introduced them to a variety of video production skills.

This workshop was conducted in two parts. The first part took place on a Friday. The second part took place the following Monday.
First, I showed them about a dozen objects from Thingiverse.com and let them vote on which one to print. While they were at first very excited about some of the Pokémon characters available, they ended up voting for this fun marble machine, by Tulio:

We then proceeded to get the print job setup. Since we were using an Ultimaker 3 3D printer for this project, we used the Cura slicing software to prepare the print job.

This model was printed in PLA filament at 0.2mm layer height. No supports were needed.
Once the print job was set up, we positioned a webcam on a tripod in front of the 3D printer. Using a program called EvoCam, we took a snapshot of the print job every 15 seconds.
After getting the print job started and verifying that the snapshots were saving properly, we adjourned for the day and allowed the print job to run. As configured, the print job took about 39 hours to complete.
When we returned on Monday, we had a very nice print waiting for us:

Using a program called Zeitraffer, we combined the many snapshots of the print job into a time-lapse video. At 30 frames per second, we ended up with a video of a little over 5 minutes. This would later be adjusted in the video editing phase to produce a shorter video.
Next, I provided the kids with choices of music to accompany their time-lapse video, and they voted for an upbeat piece called “Club Rock” which you'll hear in the final video.
Using Final Cut Pro X, I showed them how to assemble the various pieces to produce the final video. We used some title slides, the above screenshots of Thingiverse and Cura, then the time-lapse video, shortened to about 1 minute, and then we inserted some footage showing the kids assembling and testing the marble machine. After adding our chosen music and inserting transitions, we were ready to produce our video and publish it to YouTube!
The kids had a lot of fun with this workshop, as did I. If you're looking to introduce kids to 3D printing in a fun and engaging way, I recommend a project like this. Too often, the things produced by 3D printers are just static objects. In this case, you end up with a fun marble machine with moving parts that the kids can actually play with.
The “marbles” we used in the marble machine are 9.5mm steel ball bearings, which you can purchase at your local hardware store.
Here's the final 3D printing time-lapse video:
You can find the Marble Machine 3D printable model here: http://www.thingiverse.com/thing:1385312
To learn more about the Algonquin Area Public Library District, please visit: http://www.aapld.org
More 3D Universe blog posts:
Click HERE for another educational project.
Written By Jeremy Simon

There is so much happening in 3D printing right now! There is an enormous global community driving development, aided by each others’ efforts thanks to the Internet....
Related Articles
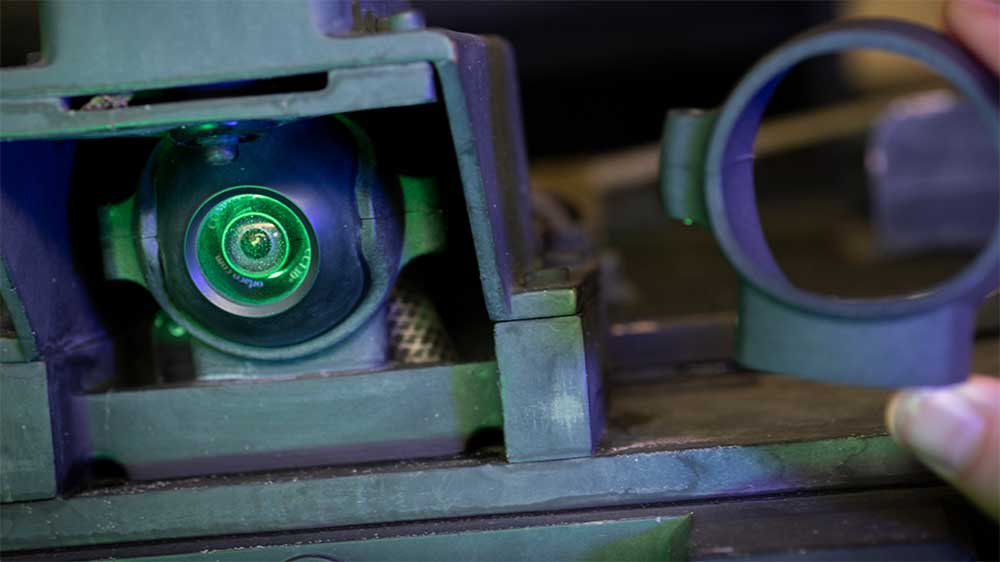
A Rapid, Cost-Effective Camera Bracket Solution for Defense Applications
Sep 05, 2025
This week we are focusing on a custom 3D printed camera bracket developed for military... More
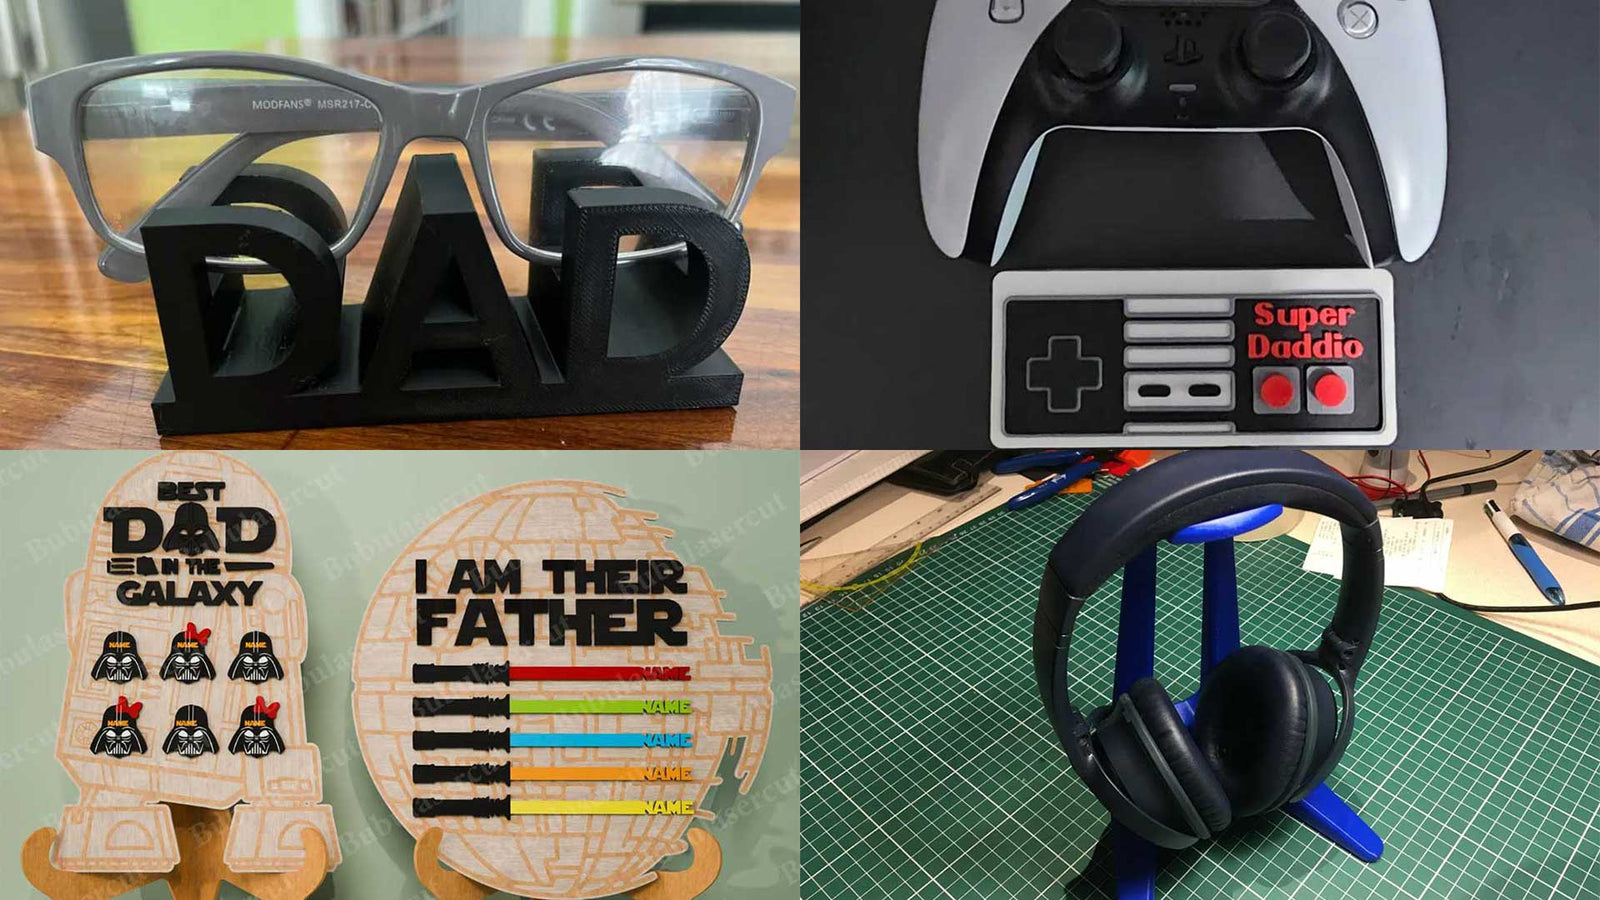
Best 3D Printed and Laser Cut Father's Day Gift Ideas in 2025!
Jun 12, 2025
Are you still searching for the perfect Father's Day gift for this year and finding... More
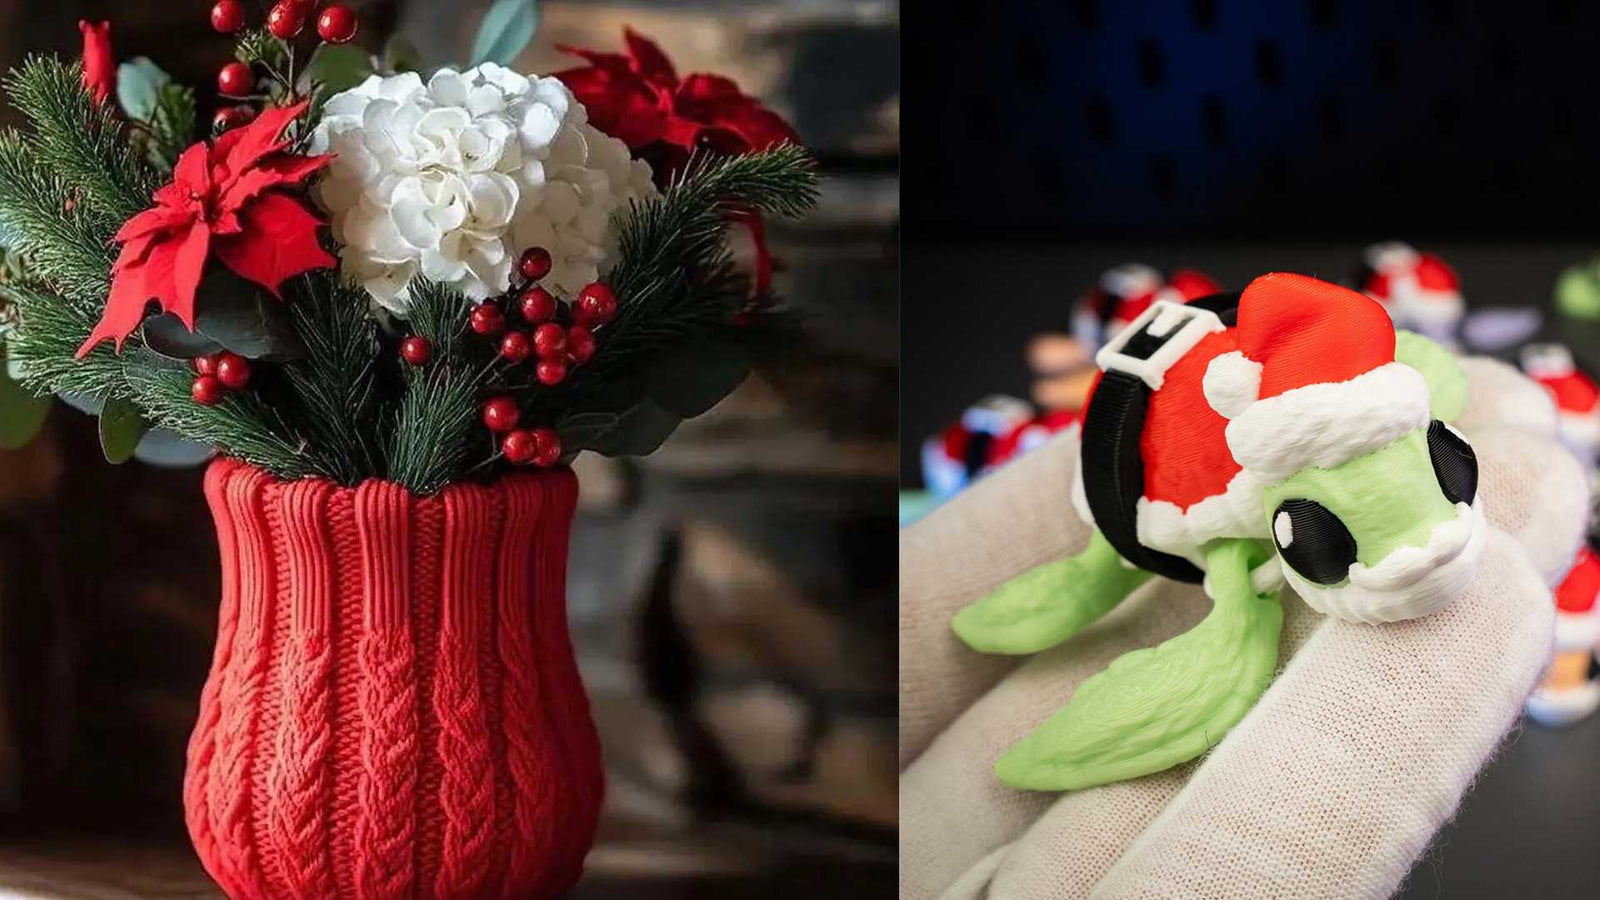
Fun Holiday 3D Printed Designs for 2024
Dec 17, 2024
It's holiday time again and we thought it would be fun to find some interesting... More

Thanksgiving Laser Cut and 3D Printed Project Ideas for 2024!
Sep 11, 2024
It's that time of year for holiday parties, family gatherings and feasting until we can't... More
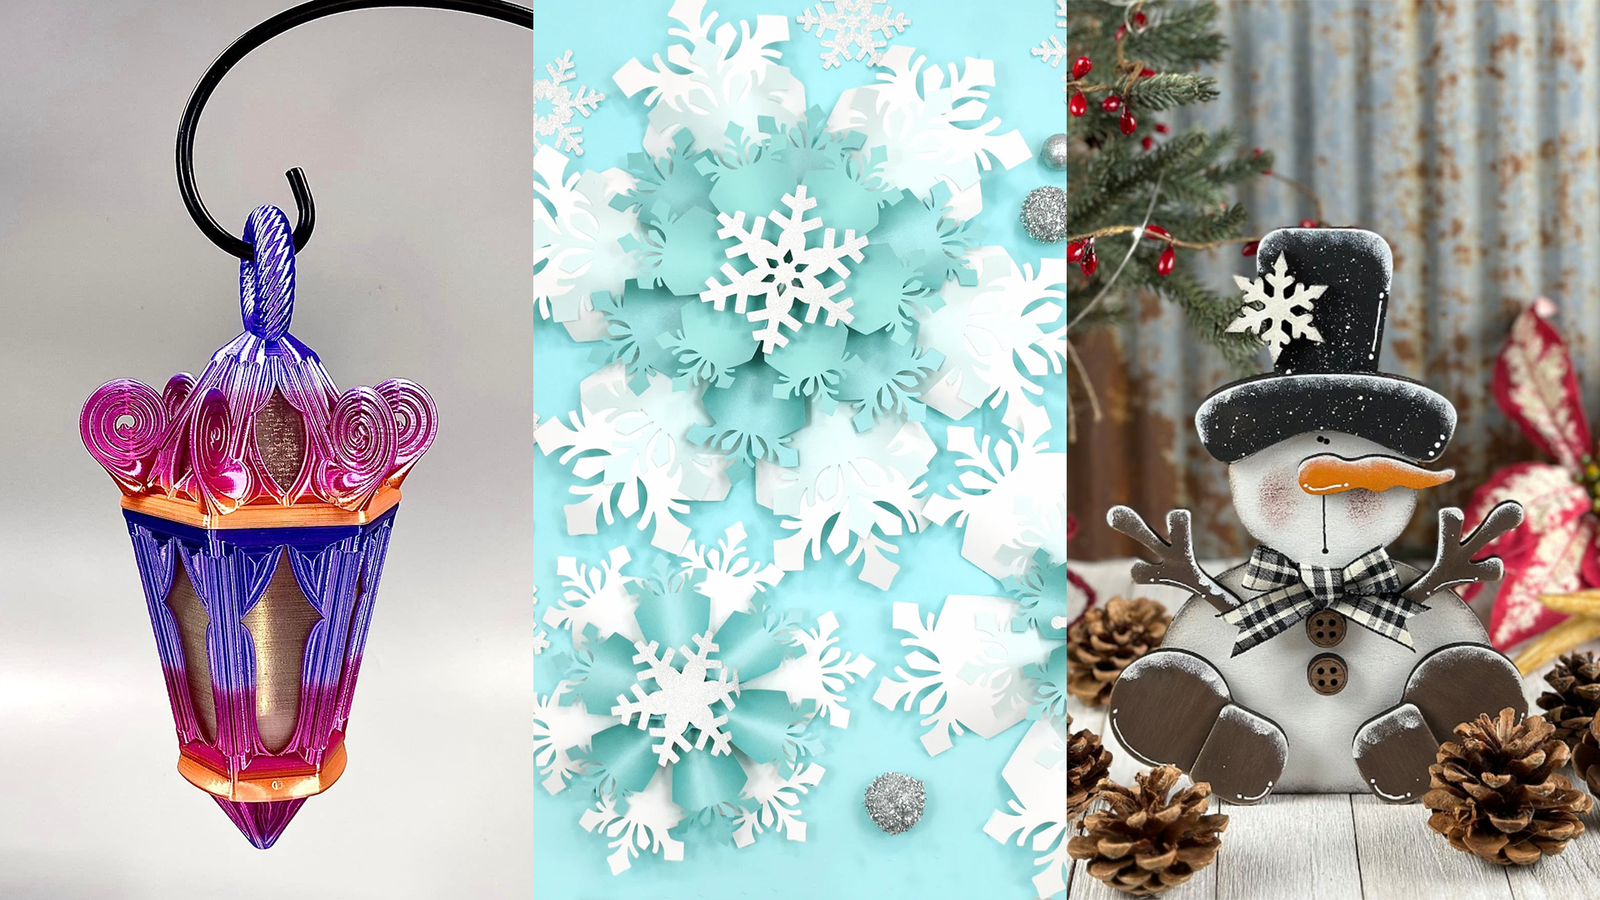
Laser Cut and 3D Printed Holiday Decoration Ideas
Sep 10, 2024
It's that time of year again! Time to fire up your 3D printers and laser... More
Halloween 3D Prints, Laser Cut and Thermoformed Designs!
Sep 10, 2024
It's spooky season again and the perfect time to fire up your 3D printers, thermoformers... More
Search All Articles
Latest Posts From Digital Fabrication Projects
All Blog Categories
-
3D Universe Untethered Video Podcast Series
-
Digital Fabrication in Education
-
Digital Fabrication Projects
-
Digital Fabrication Tutorials, Tips, and Tricks
-
Slicing Software
-
3D Printing Materials
-
Case Studies
-
Digital Fabrication Products
-
3D Forming (Vacuum Forming & Pressure Forming)
-
Laser Cutters
-
Digital Fabrication in the Workplace
-
3D Printed Prosthetics and Assistive Technology
-
3D Modeling (CAD)
-
Digital Fabrication in the News


