Musical Laser Rainbows and 3D Printed Floating Castles | Meet Artist Vic Chaney
September 20, 2023
Recently 3D Universe put out a call for you to share your stories about what you are making with your Ultimaker 3D Printer and we have already gotten some great responses!
Today we are excited to introduce you to 3D Universe customer, Vic Chaney, who is not only making teeth shine bright as a dentist, but who has also been making all kinds of fun, creative, and often quite quirky projects with his Ultimaker 2+ 3D printer!
Vic agreed to guest blog for us today about his work, his thoughts on 3D printing, his favorite materials and more! Read his story below!
Vic Chaney | Artist and Maker
I have loved making things since I was 3 years old. I started with cardboard, tape and string. I later added woodworking, welding, plastic working, casting metal in gold and silver and bronze, and working with other things as well.
I go where the muse takes me in the things that I make. I don’t make things to sell, but for my own entertainment. So it must be something that I think is cool, that turns me on to enjoy the journey of the building process, as well as the finished product.
When I bought a 3D printer, I only had some vague ideas on what I would make with it, and once I got it I was amazed at all of the things I could make. My new tool made me think of things I would not have thought of before.
The 3D printer allows a maker to make whatever strikes the imagination. If it can be imagined, it can probably be 3D printed. I have an Ultimaker 2+ printer, which I got 5 years ago. I crave getting an Ultimaker 3, for being able to print supports with water-soluble material, but my thriftiness tells me that my current printer works quite well as it is, so I’ll stay with the 2+ for a while.
I debated waiting for 3D printers to get better. I then realized that they will keep getting better, and if I didn’t get one then, I might be missing a lot of opportunities to make things and learn to use it. This was true. I have made so many things, that I would have missed too much if I waited.
I love my 3D printer!
In this blog post, I will describe some of the things I have made, and tell you about some things I have learned in order to make my prints better. I am no expert, I'm just a guy who designs and prints a bunch of things and has a great time doing it. I have more information and pictures and some building information on my website.
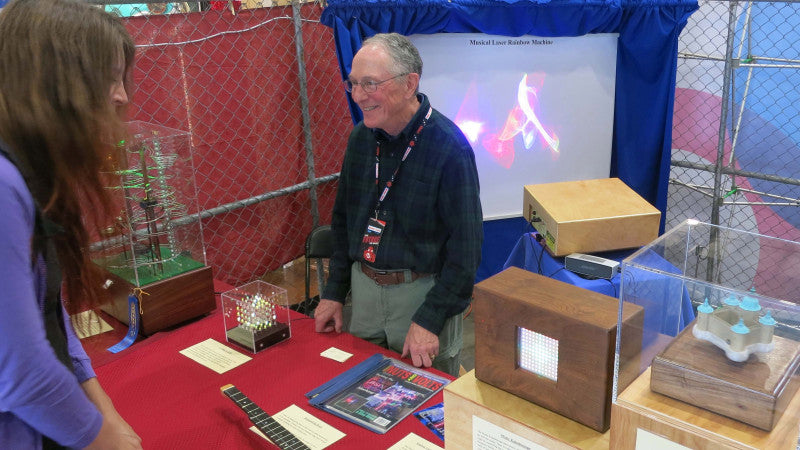
Musical Laser Rainbow Machine
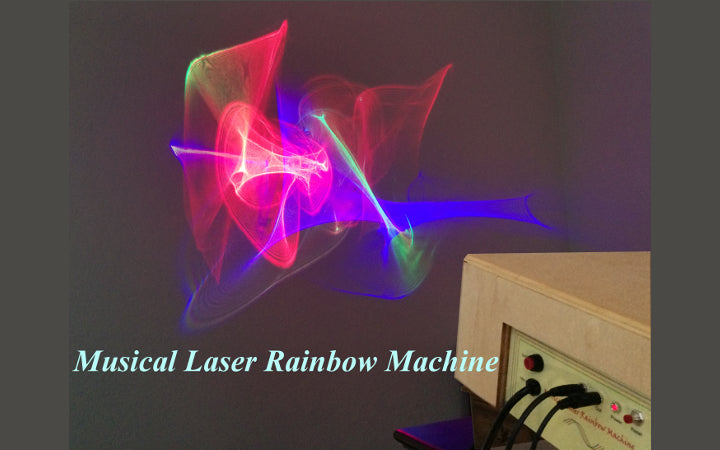
I had a great time designing and building my “Musical Laser Rainbow Machine." It takes music, separates it into frequency bands, and uses it to control 7 colored lasers projecting colored designs on the wall that are controlled by the music. This can be watched in action in the video.
My Ultimaker 2+ was indispensable in making the parts to precisely control the alignment of the lasers.
A green laser goes through a filter that passes the green light, but reflects a blue laser beam coming in from the side, to combine the two beams into one beam. This beam goes through a filter that passes the blue/green beam, and reflects a red beam coming in from the side, so that now the three beams are combined into one beam.
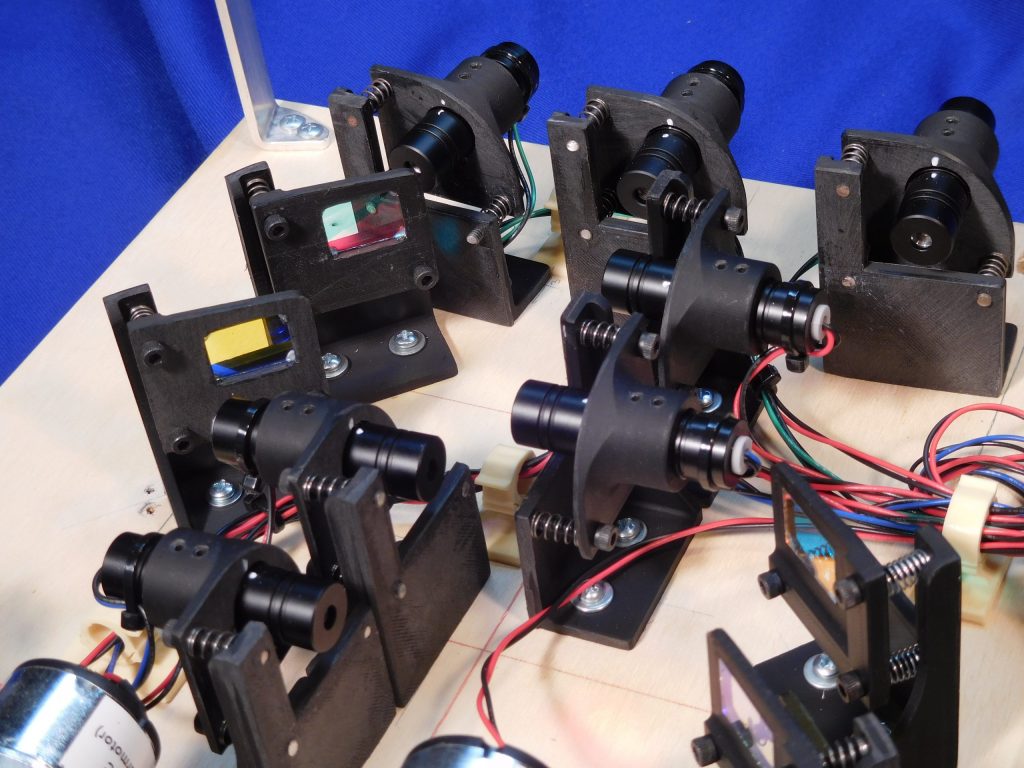
With my Ultimaker 2+, I created devices to hold the lasers and the filters that allow me to adjust the beams with precision so that everything lines up perfectly.
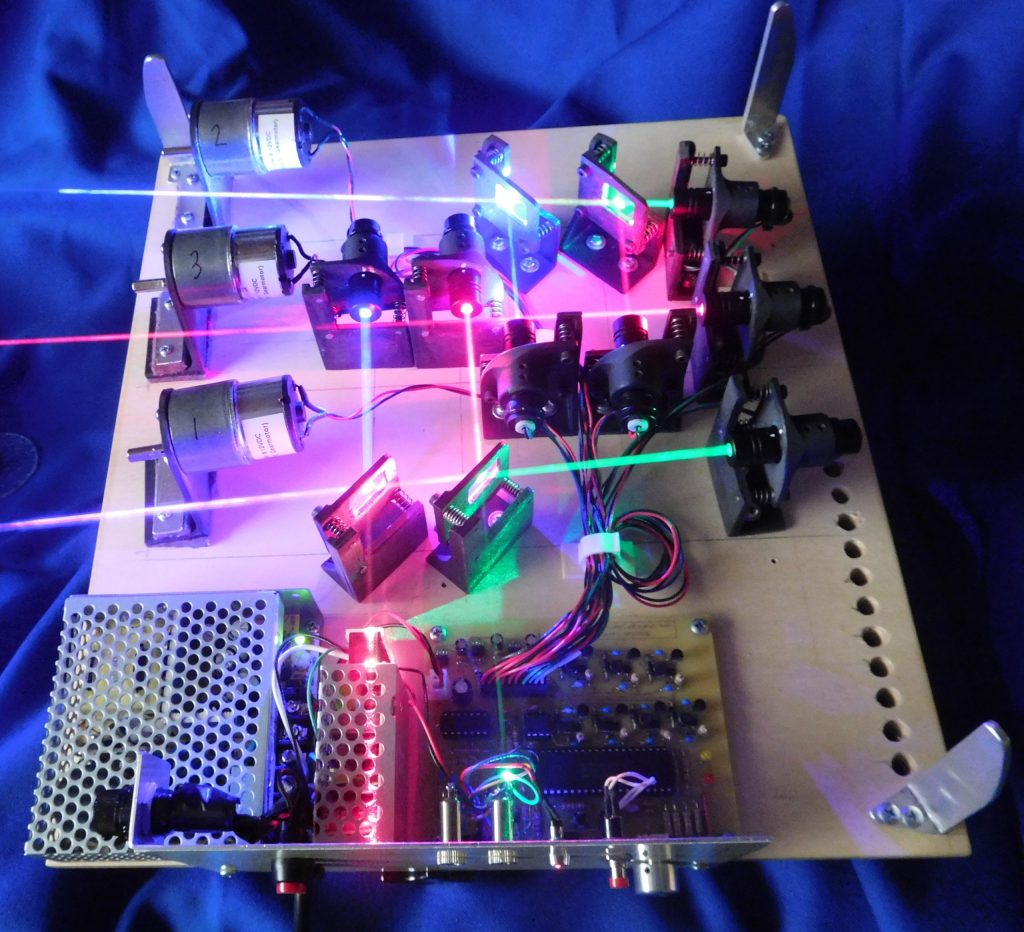
The beams pass through rotating glass filters that spin the laser beams into wonderful patterns of light. I also made motor mounts to position the motors and the glass filters that they move. I wrote an article on how to build this, which was published in Nuts and Volts magazine, May/June 2018.
If I had made this years ago, I might have made the parts out of brass: cutting, soldering, machining to get what I wanted. The Fusion 360 software allows me to perfect my designs, and print a number of copies.
With a 3D printer, one can print version 1, go back to the software and make a few changes, and a few hours later version 2 is done without much effort. You can design part of something, mirror it to get another half of it, or copy the part into a pattern. When you change the original piece, all of the copied pieces get changed too. If you make a hole somewhere, and that hole gets copied, when you enlarge the hole in the design, all of the holes in the copied parts get enlarged too!
Once you have a printer, a whole world of making opens up without much additional expense. Many of the parts I make cost less than a dollar or two for filament. I make things now that I would never have thought of making before, because this new method of creation enables me to make things that would be too difficult or time consuming to make other ways.
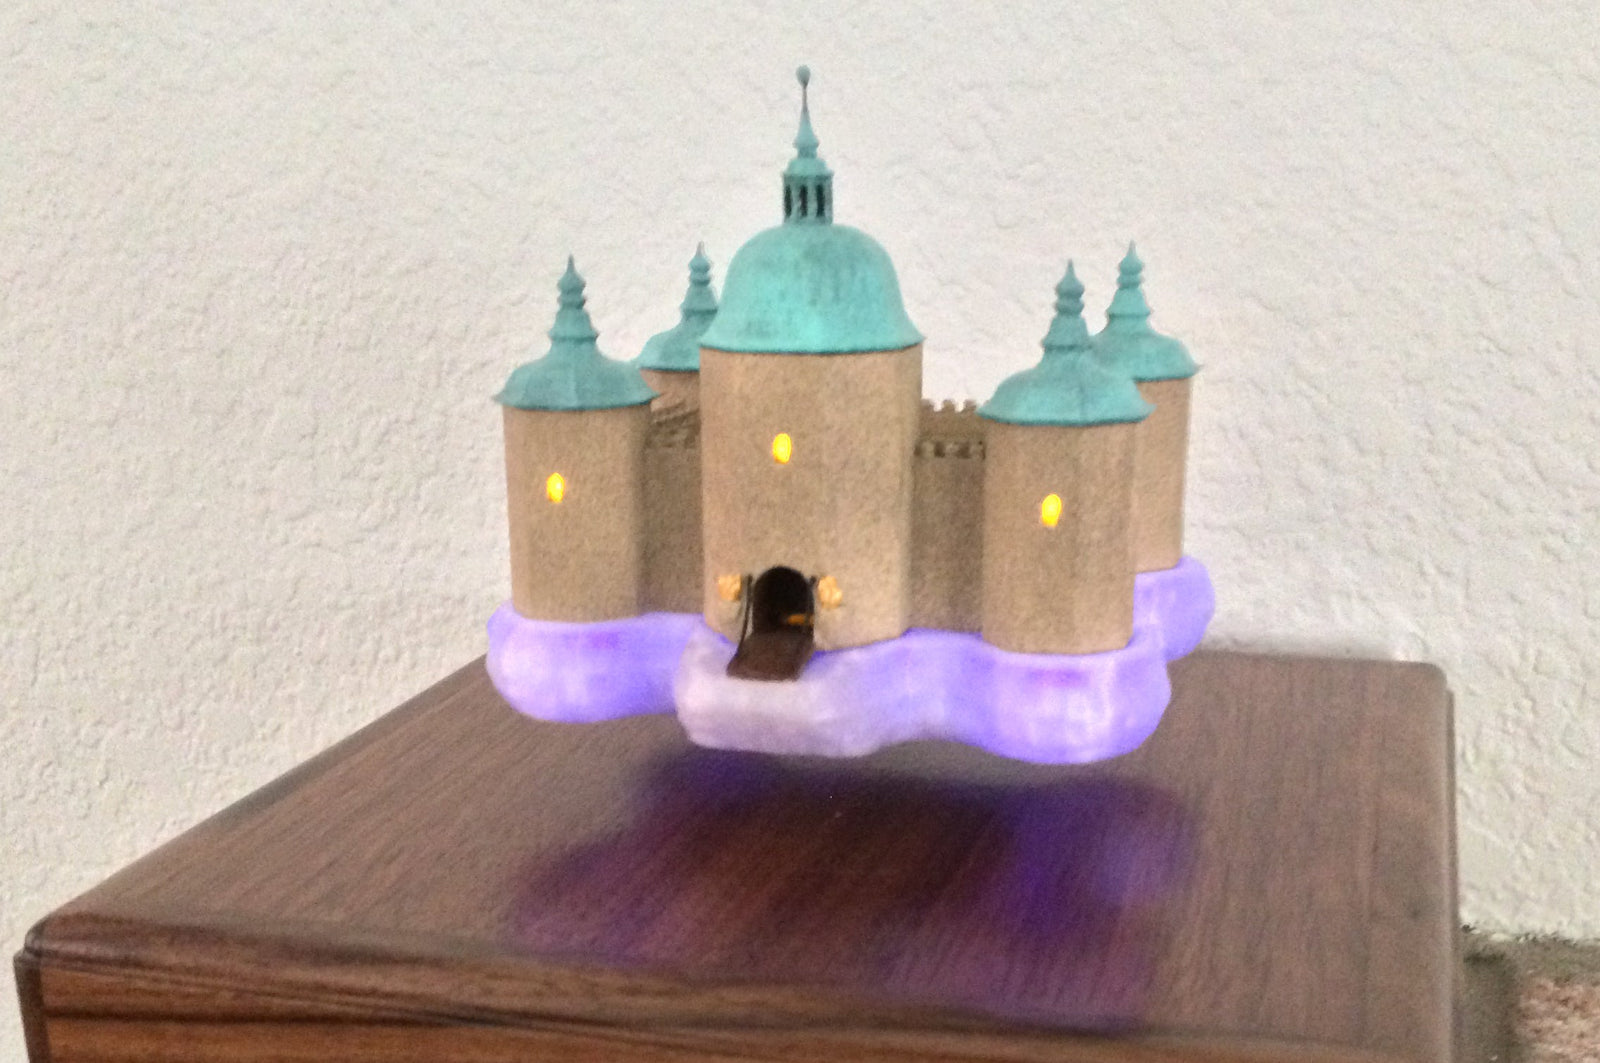
The "Castle in the Clouds"

Another fun project was a “Castle in the Clouds." I made a 3D printed castle sitting on some clouds, which is floating on a magnetic field about an inch above a box below it.
Electricity is wirelessly beamed from the base to the castle, to light yellow LEDs in the castle windows and blue LEDs in the clouds. I 3D printed the castle body, tops of turrets, and the drawbridge with brown ABS filament, and painted them to look like a castle. The clouds are printed in clear CPE plastic.
The 3D printing not only allows me to make the parts of the castle, but to make brackets for the LEDs inside the windows, channels to hold the blue LEDs inside the clouds, and locations inside of the clouds to hold powerful Neodymium magnets and copper coils to receive the wireless electrical power. I could make one LED bracket, and then copy it to all the places I needed one without having to make a new one each time. This ability can save a lot of time! I wrote a complete article on how this is made for Nuts and Volts magazine, and it is published in Issue 6, 2019. See the video of it in action.
You can find the instructions and files here to make your own!
3D Printed Graphing Weather Station
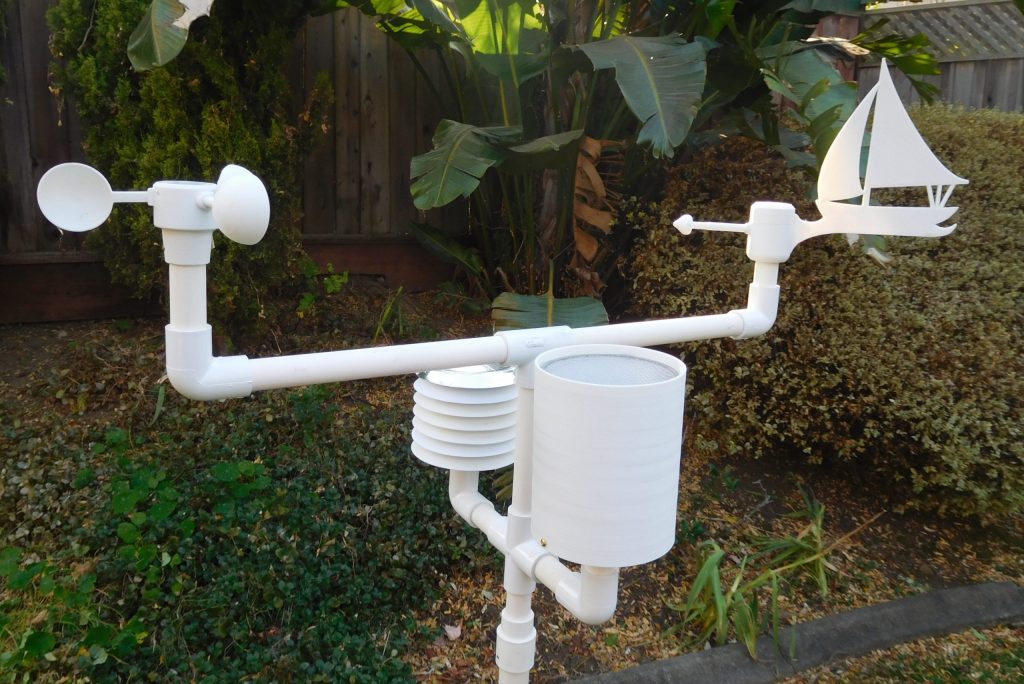
I made a graphing weather station that measures indoor and outdoor temperature and humidity, wind speed and direction, barometric pressure, and rainfall. All of these parameters are graphed on a color screen, showing what the weather has been doing.

With my 3D printer I made an anemometer to measure the wind speed: rotating cups, ball bearings, and a magnetic sensor. I made a rain gauge that has a little teeter-totter bucket. When the bucket fills from a funnel above, it tips and spills the water and exposes the other end to fill up with water. Each time it tips, it records that, and records the rainfall to 0.011 inch resolution, and is self-emptying.
A wind vane has a 3D printed sailboat as the vane (I like sailing, too), and a ball bearing and an electronic compass to measure the wind direction. A 3D printed radiation shield protects the outdoor temperature sensor from the sun but allows ventilation so that it can accurately measure the temperature without being heated by the sun.
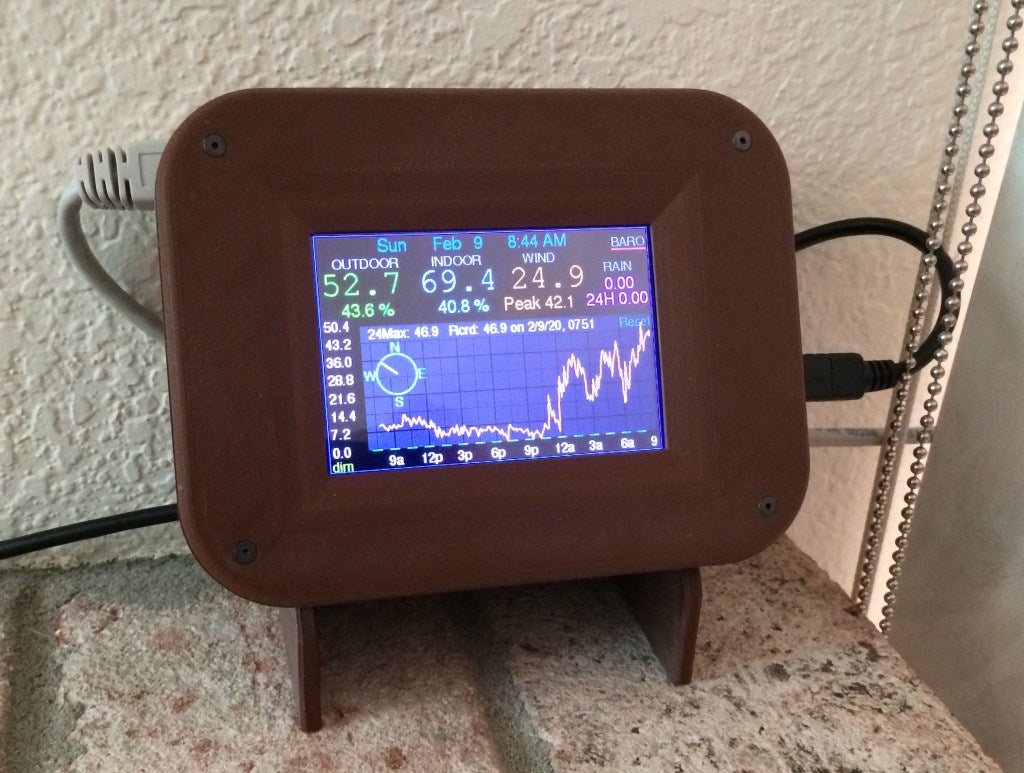
The electronics and color screen all reside in a 3D printed case and a stand for it. I wrote a complete article on how this is made for Nuts and Volts magazine, and it will be published in Issue 1, 2020, due to be available at the end of July, 2020.
Fireworks Jigs
I also like to make fireworks. Can you make fireworks with a 3D printer? Yes, sort of!
I made a jig for the construction of a “double petal ball shell”. The photo above shows my jig mounted on a hemi, or half-sphere shell casing. The half ball suspended inside the hemi allows stars and burst powder to be placed around it, while it saves the space for another layer of stars and burst powder to go inside.

When it explodes there are two layers of stars. The picture shows a shell with a 450 foot diameter burst, at 600 feet height, and a video shows this and some other fireworking efforts of me and others.
My jig will allow for a third, tiny layer inside too. This jig is for a 6 inch diameter shell, but with some simple scaling of the parts, I can make the jig for other sizes of shells, too. I go to the Western Winter Blast fireworks convention, put on by the Western Pyrotechnics Association. There one can take classes, build and set off fireworks legally.
I learned how to make double petal ball shells, and contrived the jig to help me do that. I made my first out of wood because I learned how to make double petal shells just a few days before the convention.
My favorite teacher, Cliff, suggested that 3D printing would be well suited for this. Why didn’t I think of that? So I made a jig, and after a little more refinement I’ll publish it and then others can print it easily. Cliff has invited me to help teach a class on this shell, and some of these jigs might really help. More information is on my website here.
The Infinity Cube
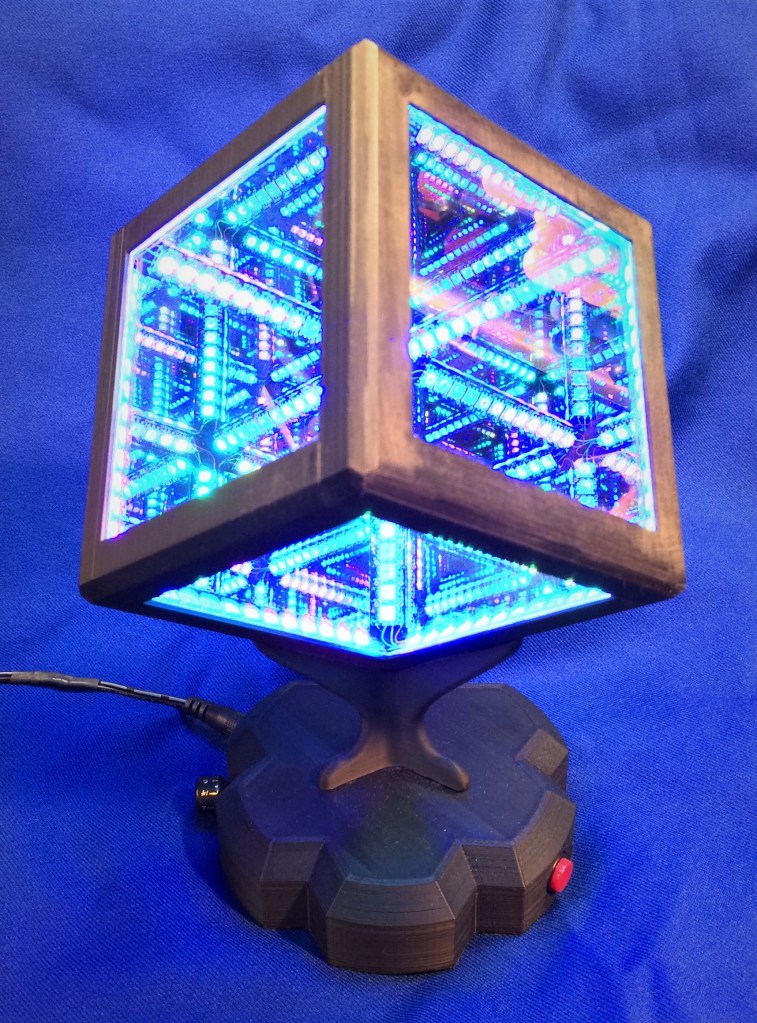
A very fun project is an Infinity Cube. Beautiful patterns of colored light move inside a box that looks 20 times bigger on the inside than on the outside. The video shows what it can do.
A 3D printer can make this rather complex shape easily. I got inspired by an Instructables article, and then made my own cube starting with designing with Fusion 360, and included a stand, a base, and a mounting floor inside the base to hold the smart parts.

I changed most of the parts and added my own programs for controlling the LEDs. My website has details and files for printing this.
3D Printed Fret Board
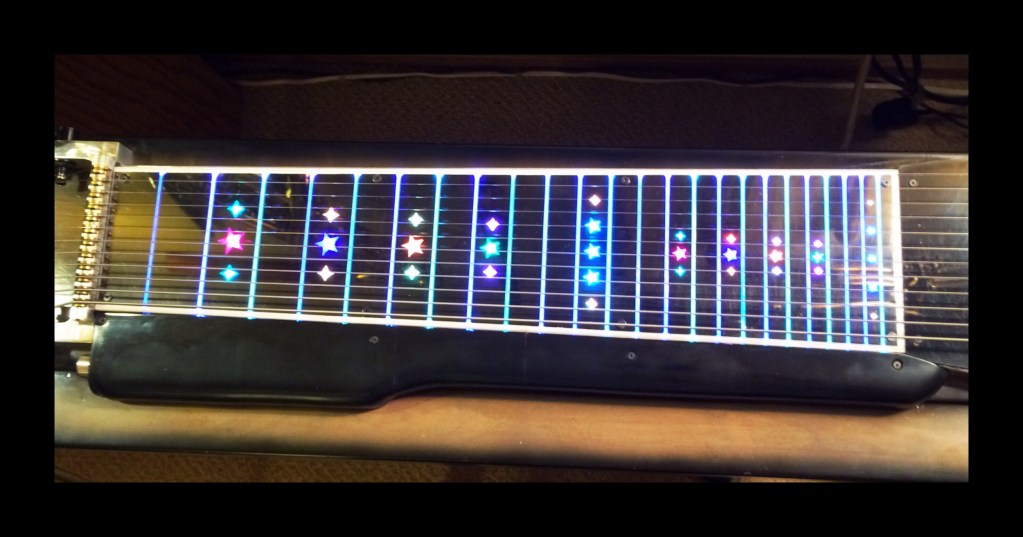
As a musician by hobby, I also play the pedal steel guitar. With my 3D printer, I created a fretboard of black ABS, with white edging, clear stars for fret markings, and embedded side-emitting fiber optics for frets. All of it is lit from underneath by multicolored LEDs. It really looks cool on the bandstand in a darkened nightclub!
For this, it was critical for the dimensions of the placement of the frets to be accurate, otherwise placing the slide bar over a fret in the wrong place would cause notes to be out of tune. I calculated that scaling the dimension of the length of the fretboard by making it bigger by a factor of 1.00736 compensates for the shrinkage of the ABS and all of the frets are positioned correctly.
Using ABS Materials in 3D Print Projects
My favorite material is ABS. After it is printed, it is so easy to work with. It can be polished to a smooth, high shine. It can be shaped and adjusted with files, sandpaper and knives. It takes threads for machine screws well. It can be glued (solvent welded) with very strong joints using ABS pipe glue or clear PVC cement from the hardware store.
Because it shrinks a little, getting it to stick to the buildplate is a challenge. If part of it comes unstuck, the print comes out wrong. Here are some things that have made a big difference:
- Use a layer of Kapton tape on the buildplate. Spray a film of slightly soapy water on the glass, and then place the tape and squeegee it down with a credit card. Heat it to 70°C for an hour.
- Paint a coat of ABS juice (ABS filament dissolved in acetone).
- I use a buildplate temperature of 100°C, and nozzle temperature of 255°C. My process improved greatly when I got that buildplate hot.
- For bigger pieces, make a disk as part of the design under the corners, sitting on the buildplate along with the rest of the part. The disk is 1mm thick and 20-30 mm diameter. Use a brim, too. The disk gives a good anchoring place to hold the corner down, and along with the brim it really helps. The disks can easily be trimmed off after printing with scissors, and smoothed with a file or sandpaper.
- I separate the print from the tape and buildplate with a sharp, 1 ½ inch wide wood chisel. If you are careful in getting under the edges of the print to pry it off, you can avoid hurting the tape. A few blemishes in the tape can be burnished down and tolerated. A subsequent print can be positioned with Cura slicing software to avoid some injured spots. I can often get 3-5 prints from one tape application. Clean the tape surface with acetone before re-coating with ABS juice and printing.
- ABS sands easily, and works especially well with wet sanding. If desired, work up to 1000 grit and polish with a rag wheel and polishing compound. A smooth, shiny surface can be obtained. Wet medium pumice on a wet rag wheel in a drill press or some other motor will smooth curves and flat surfaces well. Use plenty of water and plenty of pumice. Wear a face mask. It makes a mess, but it does well and if you move often it does not burn the plastic. Acetone vapor polishing is OK, but it can distort features and is difficult to manage with bigger prints.
- I buy all of my filament from 3D Universe. I have read that bad filament can make the printing process have problems. For 4 ½ years their filament has worked very well for me.
Thoughts on 3D Printers
I think 3D printers are an important tool for the future. Remember dot matrix printers for paper? What can our paper printers do now? Maybe someday we will be 3D printing with metal at home.
I think kids would benefit if schools make 3D printing a part of the curriculum. I hope tools like this will make young people put down their cell phones for a while and do something creative.
- Vic Chaney
Share Your Ultimaker Stories!
We are seeking more stories from our customers who are using Ultimaker 3D printers for your projects, whether that is for fun or work!
If you would like to share your story and potentially be featured on our blog, please email your story to jen@3duniverse.org! If we choose to share your project, we will send you 4 rolls of *Ultimaker Filament as a thank you!
*This offer is for USA based shipping addresses only and does not include 750g of PVA spools.
Written By Jen Owen
Related Articles
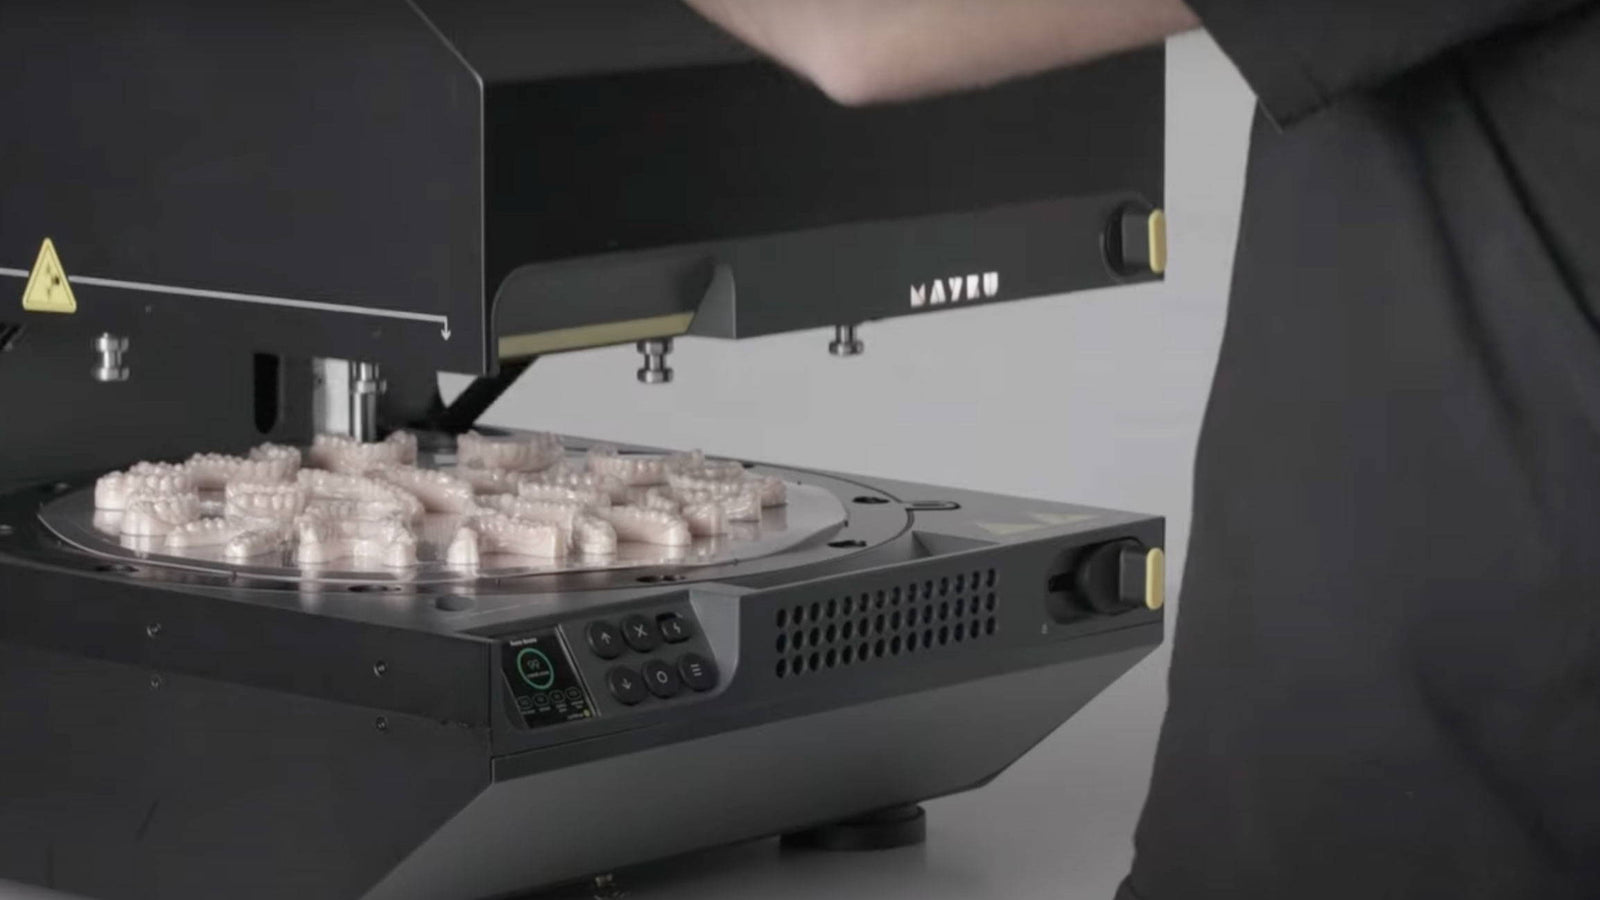
Affordable Assistive Tech Created for Children with the Mayku Multiplier
May 15, 2025
Bethany Children's Health Center in Bethany, Oklahoma, cares for children with complex medical needs, striving... More
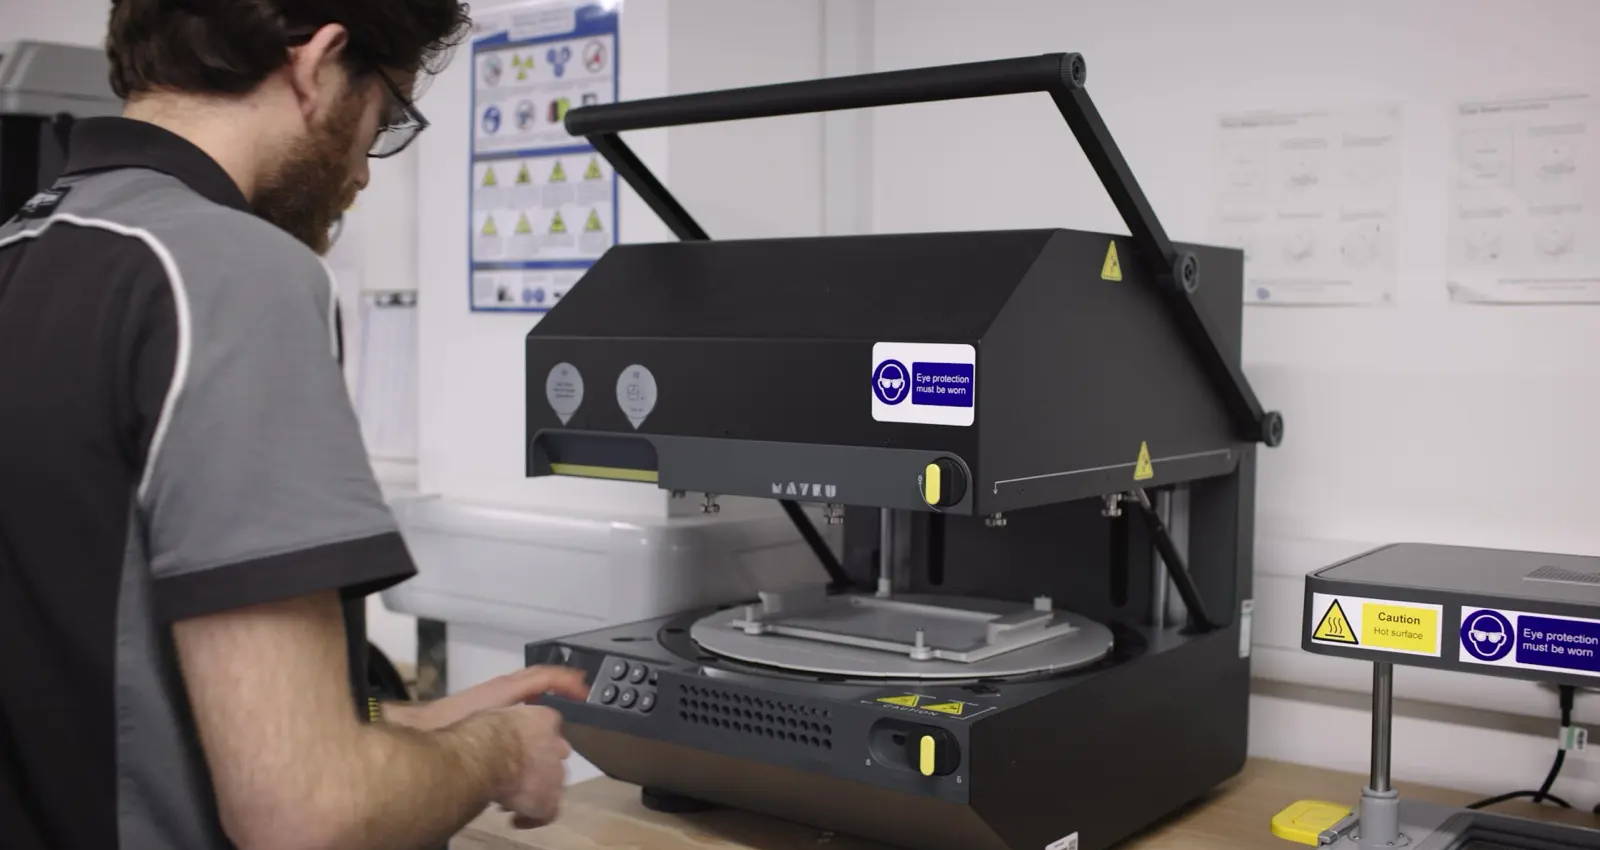
The Mayku Multiplier: A Game Changer in the Dental Industry
Apr 03, 2025
Benchtop pressure formers like the Mayku Multiplier, are revolutionizing the dental industry by enhancing the... More
Reshaping Aerospace Innovation with the Mayku Multiplier
Feb 10, 2025
At Bristol University’s aerospace department, students combine analytical methods with hands-on experimentation to design and... More
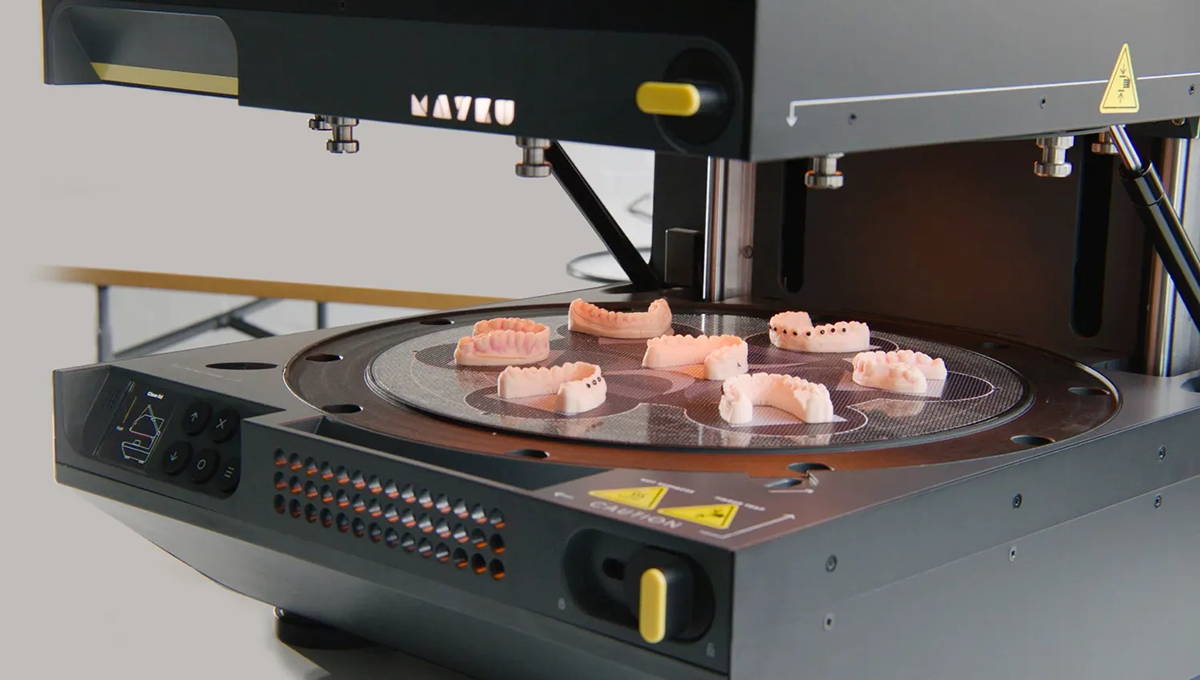
Revolutionizing the Dental Industry with the Mayku Multiplier
Dec 04, 2024
The Mayku Multiplier for Dental is a first-of-its-kind benchtop pressure former that achieves sub-one-micron resolution... More
Introducing the MY YARD Vacuum Forming Machines
Oct 01, 2024
We are excited to share that we have brought the MY YARD desktop vacuum forming... More
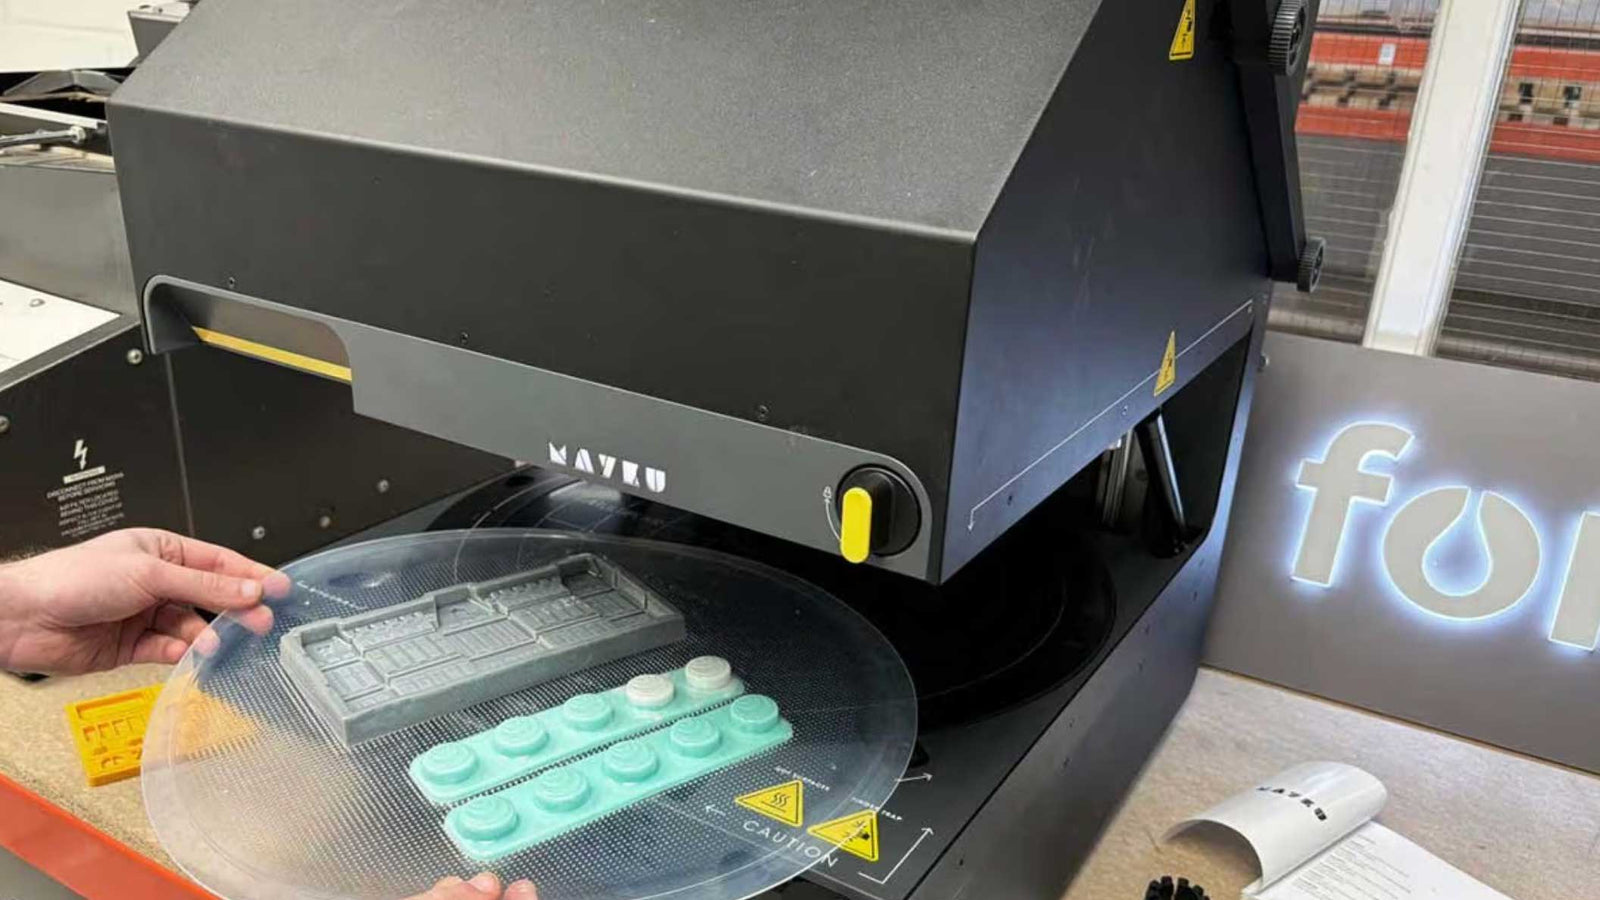
Rapid prototyping in R&D with the Mayku Multiplier
Sep 03, 2024
In the world of R&D (Research and Development) there are generally 4 common problems that... More
Search All Articles
Latest Posts From 3D Forming (Vacuum Forming & Pressure Forming)
All Blog Categories
-
3D Universe Untethered Video Podcast Series
-
Digital Fabrication in Education
-
Digital Fabrication Projects
-
Digital Fabrication Tutorials, Tips, and Tricks
-
Slicing Software
-
3D Printing Materials
-
Case Studies
-
Digital Fabrication Products
-
3D Forming (Vacuum Forming & Pressure Forming)
-
Laser Cutters
-
Digital Fabrication in the Workplace
-
3D Printed Prosthetics and Assistive Technology
-
3D Modeling (CAD)
-
Digital Fabrication in the News


